Algo Trading Software Installation Guide
This chapter will discuss in detail how to install an algorithmic trading environment. Operating system choice is considered as a necessary first step, with the three major choices outlined. Subsequently Linux is chosen as the system of choice (Ubuntu in particular) and Python is installed with all of the necessary libraries.
Package/library installation is often glossed over in additional books but I personally feel that it can be a stumbling block for many so I have devoted an entire chapter to it. Unfortunately the reality is that the chapter will become dated the moment it is released. Newer versions of operating systems emerge and packages are constantly updated. Hence there are likely to be specific implementation details.
If you do have trouble installing or working with these packages, make sure to check the versions installed and upgrade if necessary. If you still have trouble, feel free to email me at mike@quantstart.com and I’ll try and help you out.
Operating System Choice:
The first major choice when deciding on an algorithmic trading platform is that of the operating system. In some sense this will be dictated by the primary programming language or the means of connecting to the brokerage. These days the majority of software, particularly open source, is cross-platform and so the choice is less restricted.
1.) Microsoft Windows
Windows is probably the “default” option of many algorithmic traders. It is extremely familiar and, despite criticism to the contrary, in certain forms is rather robust. Windows 8 has not been hugely well received but the prior version, Windows 7, is considered a solid operating system.
Certain tools in the algorithmic trading space will only function on Windows, in particular the IQFeed server, necessary to download tick data from DTN IQFeed. In addition Windows is the native platform of the Microsoft .NET framework, on which a vast quantity of financial software is written, utilising C++ and C#.
If you do not wish to use Windows then it is sometimes possible to run Windows-based software under a UNIX based system using the WINE emulator (http://www.winehq.org/).
2.) Mac OSX
Mac OSX combines the graphical ease of Windows (some say it improves substantially upon it!) with the robustness of a UNIX based system (FreeBSD). While I use a MacBook Air for all of my “day to day” work, such as web/email and developing the QuantStart site, I have found it to be extremely painful to install a full algorithmic research stack, based on Python, under Mac OSX.
The package landscape of Mac OSX is significantly fragmented, with Homebrew and Mac-Ports being the primary contenders. Installation from source is tricky due to the proprietary compilation process (using XCode). I have not yet successfully installed NumPy, SciPy and pandas on my MacBook as of this writing!
However, if you can navigate the minefield that is Python installation on Mac OSX, it can provide a great environment for algorithmic research. Since the Interactive Brokers Trader Workstation is Java-based, it has no trouble running on Mac OSX.
3.) Linux
“Linux” refers to a set of free UNIX distributions such as Cent OS, Debian and Ubuntu. I don’t wish to go into details about the benefits/drawbacks of each distribution, rather I will concentrate on Debian-based distro. In particular I will be considering Ubuntu Desktop as the algorithmic trading environment.
The aptitude package management makes it straightforward to install the necessary underlying libraries with ease. In addition it is straightforward to create a virtual environment for Python that can isolate your algo trading code from other Python apps. I have never had any (major) trouble installing a Python environment on a modern Ubuntu system and as such I have chosen this as the primary environment from which to conduct my trading.
If you would like to give Ubuntu a go before committing fully, by dual-booting for example, then it is possible to use VirtualBox (https://www.virtualbox.org/) to install it. I have a detailed guide on QuantStart (http://www.quantstart.com/articles/Installing-a-DesktopAlgorithmic-Trading-Research-Environment-using-Ubuntu-Linux-and-Python), which describes the process.
Installing a Python Environment on Ubuntu Linux:
In this section we will discuss how to set up a robust, efficient and interactive development environment for algorithmic trading strategy research making use of Ubuntu Desktop Linux and the Python programming language. We will utilise this environment for all subsequent algorithmic trading implementations.
To create the research environment we will install the following software tools, all of which are open-source and free to download:
- Ubuntu Desktop Linux – The operating system
- Python – The core programming environment
- NumPy/SciPy – For fast, efficient vectorised array/matrix calculation
- IPython – For visual interactive development with Python
- matplotlib – For graphical visualisation of data
- pandas – For data “wrangling” and time series analysis
- scikit-learn – For machine learning and artificial intelligence algorithms
- IbPy – To carry out trading with the Interactive Brokers API
These tools coupled with a suitable MySQL securities master database will allow us to create a rapid interactive strategy research and backtesting environment. Pandas is designed for “data wrangling” and can import and cleanse time series data very efficiently. NumPy/SciPy running underneath keeps the system extremely well optimised. IPython/matplotlib (and the qtconsole described below) allow interactive visualisation of results and rapid iteration. scikit-learn allows us to apply machine learning techniques to our strategies to further enhance performance.
1.) Python
The latest versions of Ubuntu, which at the time of writing is 13.10, still make use of the Python 2.7.x version family. While there is a transition underway to 3.3.x the majority of libraries are fully compatible with the 2.7.x branch. Thus I have chosen to use this for algorithmic trading. Things are likely to evolve rapidly though so in a couple of years 3.3.x may be the predominant branch. We will now commence with the installation of the Python environment.
The first thing to do on any brand new Ubuntu Linux system is to update and upgrade the packages. The former tells Ubuntu about new packages that are available, while the latter actually performs the process of replacing older packages with newer versions. Run the following commands in a terminal session and you will be prompted for your passwords: [ sudo apt-get -y update sudo apt-get -y upgrade ]
Note that the -y prefix tells Ubuntu that you want to accept ’yes’ to all yes/no questions. “sudo” is a Ubuntu/Debian Linux command that allows other commands to be executed with administrator privileges. Since we are installing our packages sitewide, we need ’root access’ to the machine and thus must make use of ’sudo’.
Once both of those updating commands have been successfully executed we need to install the Python development packages and compilers needed to compile all of the software. Notice that we are installing build-essential which contains the GCC compilers and the LAPACK linear algebra library, as well as pip which is the Python package management system: [ sudo apt-get install python-pip python-dev python2.7-dev \ build-essential liblapack-dev libblas-dev ]
The next stage is to install the Python numerical and data analysis libraries.
2.) NumPy, SciPy and Pandas
Once the necessary packages are installed above we can go ahead and install NumPy via pip, the Python package manager. Pip will download a zip file of the package and then compile it from the source code for us. Bear in mind that it will take some time to compile, possible 10 minutes or longer depending upon your CPU: [ sudo pip install numpy ]
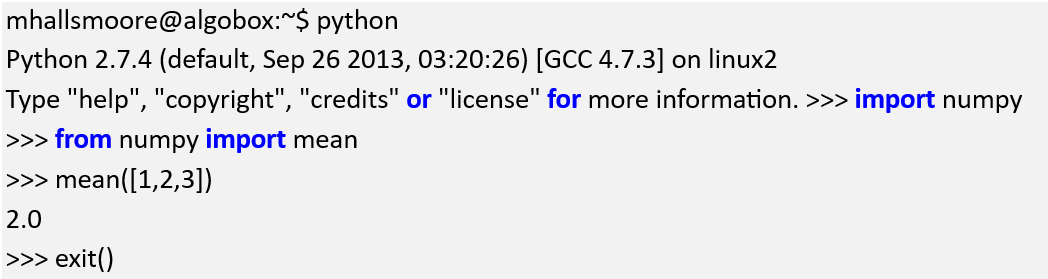
Once NumPy has been installed we need to check that it works before proceeding. If you look in the terminal you’ll see your username followed by your computer name. In my case it is mhallsmoore@algobox, which is followed by the prompt. At the prompt type python and then try importing NumPy. We will test that it works by calculating the mean average of a list:

Now that NumPy has been successfully installed we want to install the Python Scientific library known as SciPy. It has a few package dependencies of its own including the ATLAS library and the GNU Fortran compiler, which must be installed first: [ sudo apt-get install libatlas-base-dev gfortran ]
We are ready to install SciPy now, with pip. This will take quite a long time to compile, perhaps 10-20 minutes, depending upon CPU speed: [ sudo pip install scipy ]
SciPy has now been installed. We will test it out in a similar fashion to NumPy when calculating the standard deviation of a list of integers:


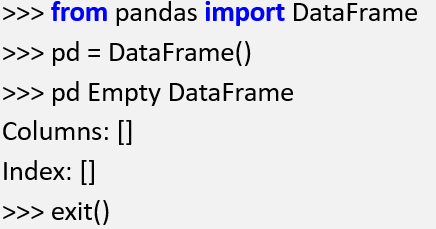
The final task for this section is to install the pandas data analysis library. We don’t need any additional dependencies at this stage as they’re covered by NumPy and SciPy: [ sudo pip install pandas ]
We can now test the pandas installation, as before:

Now that the base numerical and scientific libraries have been installed we will install the statistical and machine learning libraries, statsmodels and scikit-learn.
3.) Statsmodels and Scikit-Learn
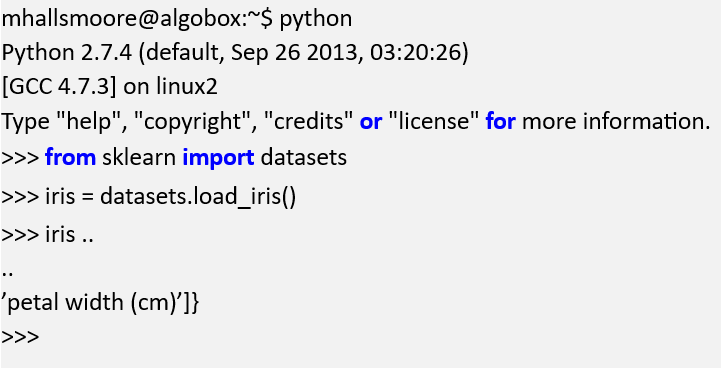
Installation proceeds as before, making use of pip to install the packages: [ sudo pip install statsmodels sudo pip install scikit-learn ]
Both libraries can be tested:

Now that the two statistical libraries are installed we can install the visualisation and development tools, IPython and matplotlib.
4.) PyQt, IPython and Matplotlib
The first task is to install the dependency packages for matplotlib, the Python graphing library. Since matplotlib is a Python package, we cannot use pip to install the underlying libraries for working with PNGs, JPEGs and freetype fonts, so we need Ubuntu to install them for us: [ sudo apt-get install libpng-dev libjpeg8-dev libfreetype6-dev ]
Now we can install matplotlib: [ sudo pip install matplotlib ]
The last task of this section is to instal IPython. This is an interactive Python interpreter that provides a significantly more streamlined workflow compared to using the standard Python console. In later chapters we will emphasise the full usefulness of IPython for algorithmic trading development: [ sudo pip install ipython ]
While IPython is sufficiently useful on its own, it can be made even more powerful by including the qtconsole, which provides the ability to inline matplotlib visualisations. However, it takes a little bit more work to get this up and running.
First, we need to install the the Qt library: [ sudo apt-get install libqt4-core libqt4-gui libqt4-dev ]
The qtconsole has a few additional dependency packages, namely the ZMQ and Pygments libraries: [sudo apt-get install libzmq-dev sudo pip install pyzmq sudo pip install pygments ]
It is straightforward to test IPython by typing the following command: [ ipython qtconsole –pylab=inline ]
To test IPython a simple plot can be generated by typing the following commands. Note that I’ve included the IPython numbered input/outut which you do not need to type:
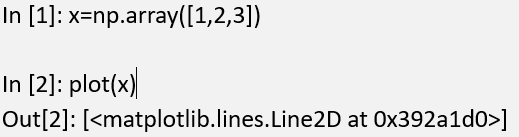

This should display an inline matplotlib graph. Closing IPython allows us to continue with the installation.
5.) IbPy and Trader Workstation
Interactive Brokers is one of the main brokerages used by retail algorithmic traders due to its relatively low minimal account balance requirements (10,000 USD) and (relatively) straightforward API. In this section we will install IbPy and Trader Workstation, which we will later use to carry out automated trade execution.
I want to emphasise that we are not going to be trading any live capital with this download! We are simply going to be installing some software which will let us try out a “demo account”, which provides a market simulator with out of date data in a “real time” fashion.
Disclosure: I have no affiliation with Interactive Brokers. I have used them before in a professional fund context and as such am familiar with their software.
IbPy is a Python wrapper written around the Java-based Interactive Brokers API. It makes development of algorithmic trading systems in Python somewhat less problematic. It will be used as the basis for all subsequent communication with Interactive Brokers. An alternative is to use the FIX protocol, but we won’t consider that method.
Since IBPy is maintained on the GitHub source code version control website, as a git repository, we will need to install git. This is handled by: [ sudo apt-get install git-core ]
Once git has been installed it is necessary to create a subdirectory to store IBPy. It can simply be placed underneath the home directory: [ mkdir ~/ibapi ]
The next step is to download IBPy via the ’git clone’ command: [ cd ~/ibapi git clone https://github.com/blampe/IbPy ]
The final step is to enter the IbPy directory and install using Python setuptools: [ cd ~/ibapi/IbPy python setup.py.in install]
That completes the installation of IBPy. The next step is to install Trader Workstation. At the time of writing, it was necessary to follow this link (IB), which takes you directly to the Trader Workstation download page at Interactive Brokers. Select the platform that you wish to utilise. In this instance I have chosen the UNIX download, which can be found here (IB Unix Download).
At that link it will describe the remainder of the process but I will replicate it here for completeness. The downloaded file will be called unixmacosx_latest.jar. Open the file: [ jar xf unixmacosx_latest.jar ]
Then change to the IBJts directory and load TWS: [ cd IBJts java -cp jts.jar:total.2013.jar -Xmx512M -XX:MaxPermSize=128M jclient.LoginFrame ]
This will present you with the Trader Workstation login screen. If you choose the username “edemo” and the password “demo user” you will be logged into the system.
This completes the installation of a full algorithmic trading environment under Python and Ubuntu.